1/11/2023

How to Cut Honda Civic Keys by Xhorse Dolphin or Condor?

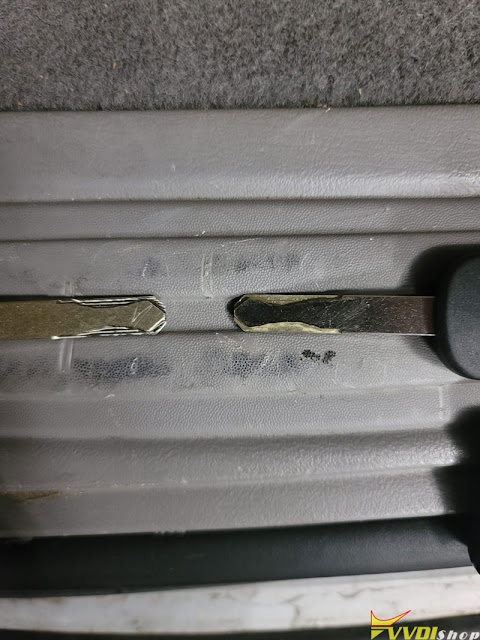
 Some people reported that they can read Honda Civic Honda high security key but could not cut the key correctly with Xhorse Dolphin or Condor key cutting machines.

Here are some useful tips on cutting these Honda high security keys.

Cut Honda Civic Keys by Xhorse Dolphin or Condor

1).

If you have the problem just remove the gas cap or glow box lock and get the code and make a whole new key just double check key image on the condor looks the same as the clients one.

2).

theres 2 options 1.41 and 1.05. tried both.
cut twice sometimes it happens.
Also make sure your buying quality keys and not junk that super hard metal to cut if so recut it twice.


3).

I got me a stone that sharpens the knifes and I slide that key a couple times and boom it fit.
Also what I usually do is use the universal cut works like a charm. I notice like every week or so I usually clean and recalibrate it also.

that’s what we have to do in uk as well. File down and they start to turn.


4).
If you aren’t using the correct web depth of 1.05 then you’ll have issues. On most of the Xhorse machines there is a 1.41 and 1.05.
I adjust each side 1.10 with the manual adjustment before it cuts each side. Honda are notorious for issues with web depth and this isn’t the only machine with it.


5).

Had that issue move to 2.5 cutter and you will have no issues the 1.5 cuts it to perfect also if the middle of key is to thick higher the depth and will work.


6).
I had the same issue with the condor, so I jumped to the dolphin x005 and and it worked perfectly. So the problem was the calibration. I don’t trace no more since the key
Reader came out. I got tired of breaking the tracer tips.

Honda keys needs to be bumped couple times in an ignition if it won’t turn..also you need a key code for machine to cut it..if you Lishi hon66 it’ll be allover the place until you see code found under Find Bittings option..use Autocode to buy code fastest and easiest way and put price per code on customer tab.


7).

Cut these keys 2 times
Also, use brush or fine file to remove the burs along the edges and also a bit of the stop
After cutting many machines do not cut enough close to the head of the key which does not allow the key to go all the way into the cylinder.

Also, the 1st time jiggle the key a bit until.it finally turns, this will seat the key into the proper position within the cylinder Usually cutting the key 2 times on each side works Especially, if your blade is a bit worn out.


8). Go thru calibrate the machine and then calibrate the m2 head and do universal key duplication.

Honda key-calibrate-calibrate and calibrate before you cut!

It is possible that you have to do a full calibration, there are many steps to follow.


9) Or use dolphin xp007 manual key cutting machine.

1/05/2023

Setup, Calibrate, Test, Update Xhorse Condor II

 This is a guide on how to setup, calibrate & test, update Xhorse Condor XC-Mini Plus II key cutting machine for the first time. Read this article carefully to learn.


How to prepare Condor II?

  1. Plug in device, and power it up.
  2. Remove brands & loosen milling bolts with provided hex wrench, then insert probe into left-side clamp, cutter into right-side.
  3. Align probe and cutter at visually even height once tightened.
  4. Fully inset M5 clamp from right to left into clamp vice, secure in place.

set up Xhorse Condor II 1

set up Xhorse Condor II 2

How to setup & bind Condor II?

  1. Select preferred language, accept privacy policy and continue.
  2. Connect to WiFi
  3. Log in Xhorse account to get security code, press “OK” to bind device.

Device activation success.

set up Xhorse Condor II 3

set up Xhorse Condor II 4

How to calibrate & test Condor II?

  1. Setting >> Device calibration >> Height calibration >> Start

Tip: install M5 clamp then select A position(side A is upwards) and tighten left, don’t insert key blank.

calibrate Xhorse Condor II 1

calibrate Xhorse Condor II 2

  1. Once complete begin “Cutting Calibration”, insert HO01 test key, align with last mark, flat and secured into place before starting.

Use debris brush to remove all metal shavings from the clamp and key surfaces then continue.

calibrate Xhorse Condor II 3

  1. Clamp Deviation >> M5-A clamp, insert and align HON66 test key to fifth and final marker. Press “Start”.

When completed, move on to side-B and place key blank into the channel, sitting atop of the clamp surface before tightening.

calibrate Xhorse Condor II 4

calibrate Xhorse Condor II 5

Tip: Incorrect insertion will result in an error code and red flashing hazard to signal need of adjustment. Simply correct and continue.


  1. Begin “Motor Measurement”. Run each test once to ensure proper function and movement of all rotors, for all 4 angles off motion.

calibrate Xhorse Condor II 6


  1. In order to test the “Electrical Conductivity”, use a key blank to ground the probe or cutter to the clamp. Green circle means good connection.

calibrate Xhorse Condor II 7


How to finish settings & upgrade?

  1. Select “Cutting Setting” to see available adjustments or setup options available to make the Xhorse Condor 2 your perfect cutting machine.
  2. Go to Update and install any every time they are available to ensure perfect function.

Once updated, check out the fully-packed, ready to work Key and Vehicle Lists.

update Xhorse Condor II 1

update Xhorse Condor II 2

www.vvdishop.com

https://www.vvdishop.com/service/set-up-calibrate-and-update-xhorse-condor-ii.html