Showing posts with label Condor XC-009. Show all posts

5/08/2026

Xhorse Condor XC-009 Alignment Guide

Proper calibration ensures precision and extends tool life. Follow these steps to align your Xhorse Condor XC-009 before its first use or after mechanical impact. Ensure the power remains OFF throughout the entire procedure.


Preparation & Required Tools

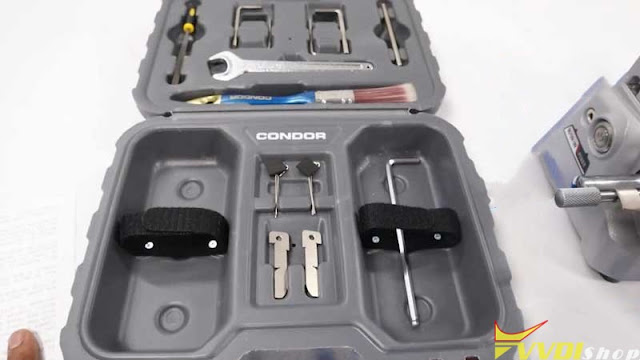
Before beginning, verify that your work area is clean and you have the following tools from your kit:

  • Allen Wrenches: 5mm and 3mm hex keys included in your kit.
  • Calibration Gauges: Two standard gauges provided with the Condor XC-009
  • Flashlight: Highly recommended for verifying precise alignment in the jaw.


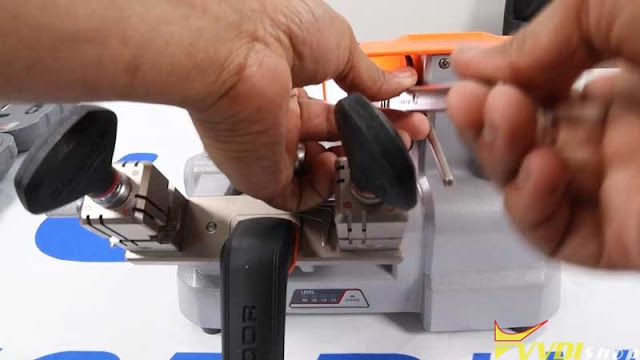
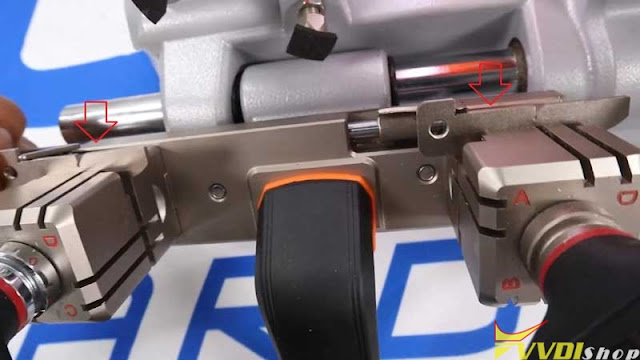
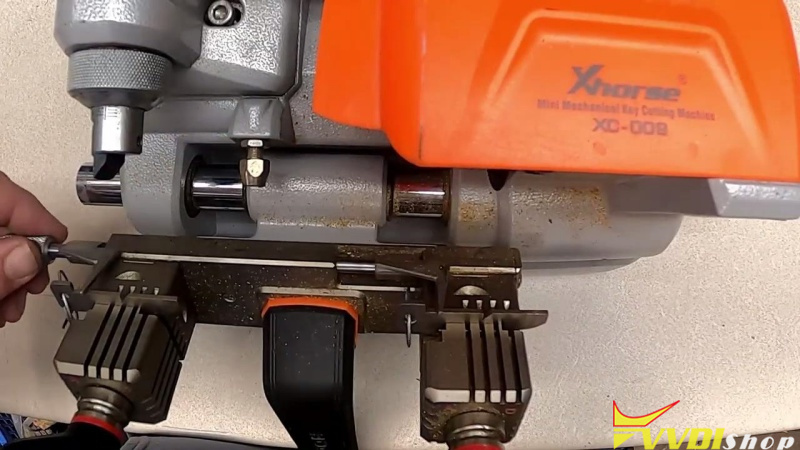
Step 1: Jaw and Gauge Setup

  1. Clean the Stopper: Ensure the key stopper is free of debris and perfectly straight.
  2. Set Jaw Position: Rotate both the left and right jaws to Side A.
  3. Install Gauges: Slide the gauges into the jaws until they hit the lip, hold them tight, and lock them down.

Xhorse Condor XC-009 Alignment  1

Xhorse Condor XC-009 Alignment 2

Xhorse Condor XC-009 Alignment 3

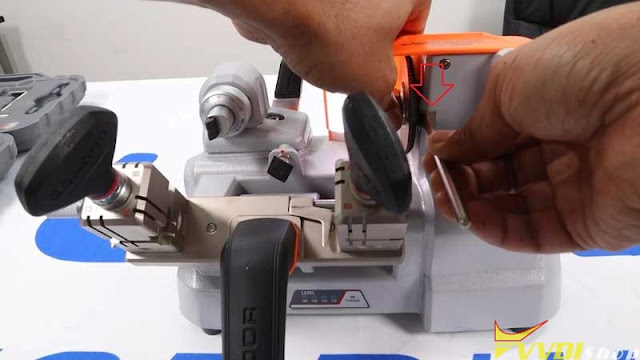
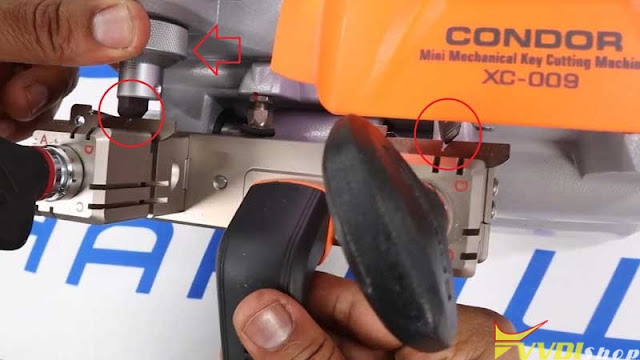
Step 2: Lateral (Horizontal) Adjustment

If the tracer does not align horizontally with the gauges:

  1. Unlock the Axis: Use the 3mm Allen wrench to unlock the lateral adjustment mechanism.
  2. Adjust Movement: Use the 2.5mm Allen wrench on the bottom of the unit to shift the guide until it slides smoothly into the gauge.
  3. Secure the Setting: Relock the adjustment screw once horizontal alignment is achieved.

Xhorse Condor XC-009 Alignment 4

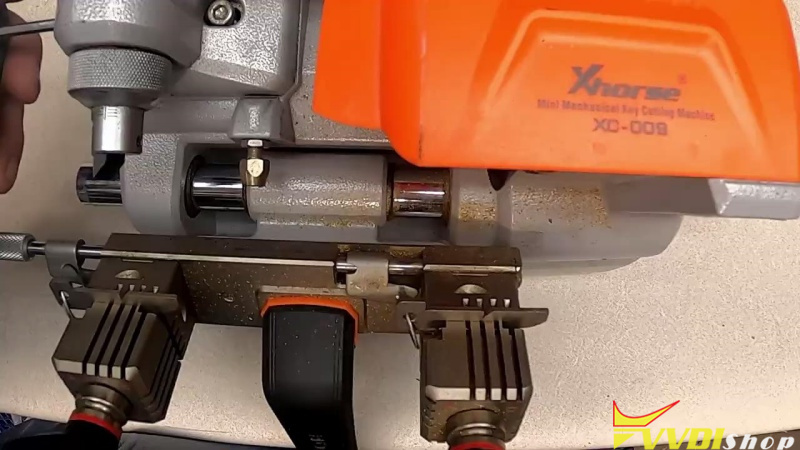
Step 3: Depth (Micrometer) Fine-Tuning

  1. Release Top Lock: Slightly loosen the lock/unlock knob at the top of the machine.
  2. Dial the Micrometer: Turn the micrometer knob to adjust the depth.
  3. Control Direction: Turning the micrometer can push the guide out or draw it in for a tighter fit.
  4. Final Lock: Once the guide sits perfectly flush, lock the jaw and the top knob.

Xhorse Condor XC-009 Alignment 5

Xhorse Condor XC-009 Alignment 6

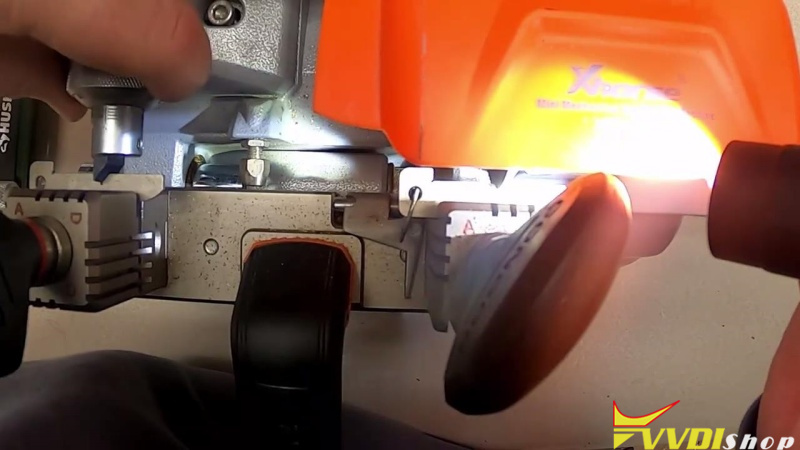
Step 4: Verification

  1. Shoulder Stop Check: Verify that the shoulder stop is functioning correctly and aligning with your gauges.
  2. Visual Inspection: Use a flashlight to confirm the tracers are properly seated in the gauges.

Xhorse Condor XC-009 Alignment 7

www.vvdishop.com

4/19/2024

How to Solve Xhorse Condor XC-009 Battery Discharge?

 Problem:

We have problems with Xhorse Condor XC-009 manual key cutting machine! The battery seem to discharge within a few days. The batteryalso discharge when we don’t cut keys with them!


Solution:

Charge the battery overnight and measure the battery voltage. The voltage should be 24-25v if fully charged.


Remove screws and remove shell.

Xhorse Condor XC-009 Battery Discharge 1

Measure voltage.

Xhorse Condor XC-009 Battery Discharge 2

If the voltage is below 24v, take a video and send to www.vvdishop.com technical support. You condor xc-009 may need a battery replacement.

10/23/2022

Xhorse Dolphin XP005 Cut PSA SX9 Key Blade

 What’s the best way to cut key PSA with SX9 blade using xhorse dolphin xp005?

Xhorse Dolphin XP005 Cut PSA SX9 Key Blade

These are good suggestions from dolphin users, try them out until you succeed.


Suggestion 1:

For the cut on top I have use this clamp (dolphin xp005l m5 clamp). For side cute I have use universal duplication


Suggestion 2:

Use the XP005 for the 2 first sides And then use a manual Condor XC-009 for the 2 other sides, works perfectly. You can move the new key for better cutting.


Suggestion 3: 

I found a good way

First step: cut by decoding with « 5 bitting » program

Second step: cut using 4-5 bitting programs and stop the program halfway

Xhorse Dolphin XP005 Cut PSA SX9 Key Blade  2
Xhorse Dolphin XP005 Cut PSA SX9 Key Blade 3

2 programs on the tablet
1st stage I cut only the edges with the program 5 bitting by decoding
2 stage program 4-5 bits I manually entered the bits to strawberry, and in the middle of the program when it asks you to turn the key I simply stopped.

8/16/2022

Xhorse Condor XC-009 vs Dolphin XP008

 Xhorse mini mechanical manual key cutting machine Dolphin XP-008 and Condor XC-009 which one to choose?


Check table comparison below:

ItemXhorse Condor XC-009Xhorse Dolphin XP-008
Imagecondor xc-009dolphin xp008
With Battery
Built-in Lithium battery

60-100 keys cut in one charge

Built-in Lithium battery
Support Key TypesFor Single-Sided and Double-sided Keys, flat keys for bikes, cars and domestic locksFor Bit/Double Bit/Dump keys, and safe deposit box keys
Input Frequency 47-63Hz
Spindle Speed1800rpm1050rpm
Travel of table95mm46mm
Power200W145W
Input Voltage12V-18V/3A12V DC
Motor Torque1.2Nm1.32Nm
Net Weight10.66kg10.8Kg
Gross Weight12Kg12.5Kg
Clamp4-side clampAll-purpose 3-side clamps
With LED indicatorYesYes

Dolphin XP008 and Condor xc009 are different manual duplicators.  XP008 is designed to cut bit/pump and safe deposit box keys. XC-009 can duplicate flat keys for bikes, cars and domestic locks.

www.vvdishop.com

3/02/2022

How to Calibrate & Maintain Xhorse Condor XC-009?

 Xhorse Condor XC-009 is the first battery-powered rechargeable manual Key Cutting Machine that was made to be portable and brought anywhere you want. It’s a workhorse, strong, durable and easy to use.

Calibrate & Maintain Xhorse Condor XC-009 1

6 Highlights of Condor XC-009

  • Battery Indicator

The screen clearly shows the battery level for your convenience.

  • Wide Clamp Spacing

The space between 2 clamps is 95mm, which is able to cut keys without detaching the key fob.

  • Revolving Handwheel

A special structure is designed for users to easier complete the lateral cutting feed. Just unscrew and turn the small concealed handwheel to control the clamp sliding table to go left or right.

  • LED Light

The LED light is ideal for checking key cutting status clearly, and also ensuring the regular works in the dark.

  • Micro-adjust Guide

Adjust the Micro-adjust slide to align the cutter with key cutting guide. Equipped with the micro-adjustable guiding device to guarantee precision cutting.

  • Ergonomic Design

Ergonomic lifting handle, smooth and effortless. Its best ergonomic solution often helps users improve productivity. By its excellent design to allow for good posture, less exertion, fewer motions, the key cutting works become more efficient.

Calibrate & Maintain Xhorse Condor XC-009 2

What’s in Condor XC-009 Carrying Case?

2x Alignment Shims for calibration and key alignment

1x Wrench for blade removal

1x Brush for cleaning out things off

1x Small rasp file for cleaning cut key edges

1x Blade immobilizer for blade changes

Calibrate & Maintain Xhorse Condor XC-009 3

Calibrate & Maintain Xhorse Condor XC-009 4

How to do Condor XC-009 Calibration & Maintenance?

  1. Insert blade immobilizer into a slot next to the blade until the blade is no longer mobile.

Calibrate & Maintain Xhorse Condor XC-009 5


  1. Use the wrench to loosen up the bolt to take the blade off.

Calibrate & Maintain Xhorse Condor XC-009 6


  1. Align 2 shims to the edge of 2 clamps for an equal distance, then tighten them up.

Calibrate & Maintain Xhorse Condor XC-009 7

Calibrate & Maintain Xhorse Condor XC-009 8

  1. Anti-Clockwise or clockwise adjust the scale, make sure 2-sides probes are touching with blades on the same level.

Calibrate & Maintain Xhorse Condor XC-009 9

Check if they are right in position. If yes, you’re ready to cut keys.


Xhorse Condor XC-009 Horizontal Key Cutter always focus on details to provide efficient & safe solution for locksmiths. If you have more questions, welcome to contact us.

 https://www.vvdishop.com/service/xhorse-condor-xc-009-calibration-and-maintenance.html